General Warm-up8 min
row
5 min steady · zone2 conversational
Easy pace, ~130 bpm for 5 min.
treadmill (backward, incline)
3 min steady · zone2 conversational
15% incline, 3 km/h, walking backward.
Mobility Primer6 min
90/90 Hip Switches (dynamic flow)

External video — 90/90 Hip Switch (Improve Hip Health & Mobility) by Simone Sports Performance.
How to do it
- Setup
- Sit on the floor. Front leg bent 90° at hip and knee, shin angled across your body toward the far hip — this hip is now in external rotation. Back leg bent 90°, shin angled out behind you, away from your body — this hip is in internal rotation. Spine tall, hands off the floor.
- Execution
- Lift both knees slightly off the floor and rotate through the hips — not the hands — to swap which leg is in front. Flow side to side for the prescribed time, each bout under 20 seconds.
- Common error
- Pushing or dragging yourself around with your hands instead of rotating from the hip — if you need your hands to move, you're not doing the drill.
- Feel
- Smooth rotation through both hips, no catching. Dull ache anywhere is fine, keep going. A sharp pinch in the right hip crease means stop that rep and shorten the range.
Dynamic flow, 8 reps each side — 1 set only this week.
8/side · bout <20s · rest 0:15
Prescribed: 8/side · bout <20s · rest 0:15
Hip-flexor PAILs/RAILs (couch-stretch position)

External video — Couch Stretch PAIL RAILS TUTORIAL by SJC Physiotherapy.
How to do it
- Setup
- Kneeling lunge: rear knee down, rear foot up against a wall or bench behind you. Front foot flat on the floor, well out in front. Torso tall, ribs stacked directly over your pelvis — not leaning back.
- Execution
- PAIL: squeeze the rear glute and drive that knee down into the pad, ramping the effort up over 5-10s, hold at peak, release over 5s. RAIL: immediately try to drag the same knee forward off the pad against your own resistance, hold 5-10s. That's one rep. Repeat for the prescribed reps, then switch sides.
- Common error
- Arching the lower back to lean the hips forward and fake extra range — the stretch has to come from the front of the rear hip, not from your spine. Keep the ribs stacked down over the pelvis the whole time.
- Feel
- A building stretch through the front of the rear hip/quad during the PAIL, real muscular effort during the RAIL. Dull ache is fine. A sharp pinch in the right hip means back off the depth now, don't push through it.
Couch-stretch position. Ramp to 40-50% effort over 5-10s, hold peak 5-10s, release 5s (PAIL); immediately RAIL, draw the knee forward against resistance, hold 5-10s. 2 reps/side.
2 reps/side · ramp 20s, hold 8s · effort RPE 4-5 · rest 0:30-1:00
Prescribed: 2 reps/side · ramp 20s, hold 8s · effort RPE 4-5 · rest 0:30-1:00
Banded Hip Distraction

External video — Banded Hip Distraction by The Active Life.
How to do it
- Setup
- Loop a heavy band around a low, sturdy anchor (a rack post works well). Step into the band so it sits high in the hip crease of the working leg, facing the anchor, then walk backward away from it until there is strong, obvious tension pulling that hip straight back toward the anchor.
- Execution
- Sink into a shallow squat or split-stance lunge on the banded side, letting the band's pull gently distract — open a small gap in — the hip joint. Rock or shift gently through a few positions for the prescribed time, breathing normally throughout.
- Common error
- Standing too close to the anchor so there is little or no real band tension — the whole point is the joint distraction, not just standing near a band. If you can't feel a clear backward pull on the hip, step further away.
- Feel
- A gentle "opening" sensation deep in the hip joint, not a muscular stretch — this is a joint-capsule mobilization, different from the muscle stretches elsewhere in the primer. No sharp pinch; if the right hip sharpens, step closer to the anchor to reduce the pull rather than stopping outright.
Light — 1 set, 20s each side.
20s/side hold · rest 0:15
Prescribed: 20s/side hold · rest 0:15
Benchmark
hip 90 90 external rating
Full 4-week retest: log now, before loading, and compare against Week 1.
Benchmark
hip 90 90 internal rating
Full 4-week retest: log now, before loading, and compare against Week 1.
Accessories — Opening Activation4 min
Toes-to-Bar

External video — Strict Toes To Bar by Marcus Filly.
How to do it
- Setup
- Hang from a pull-up bar with a full overhand grip, hands shoulder-width, arms straight, body hanging still with no swing before you start.
- Execution
- Brace the core and drive both feet up in an arc toward the bar, aiming to touch your toes to it, keeping the legs as straight as you can manage. Lower back to a still dead hang under control before the next rep. That is one rep.
- Common error
- Kipping — using a swinging, whipping motion from the shoulders and hips to throw the feet up, then riding the swing back down. Control the swing at both the top and the bottom; this is a strict core movement, not a CrossFit-style kip.
- Feel
- A hard, building ab/hip-flexor burn and a real grip challenge. If you can't yet touch the bar with straight legs, bent-knee "knees-to-chest" reps are the honest regression — still dead still at the bottom, still no kipping.
Easy version this week.
2 × 10-12 @ RPE 6 · rest 1:00
Prescribed: 10-12 @ RPE 6 · rest 1:00
Prescribed: 10-12 @ RPE 6 · rest 1:00
Main Lift — Back Squat12 min
Back Squat
This is a deload. RPE 5-6 should feel almost too easy. Resist the urge to add weight or grind.
2 × 6 @ RPE 5-6 · tempo 2-0-1-0 · rest 2:00
Prescribed: 6 @ RPE 5-6 · tempo 2-0-1-0 · rest 2:00
Prescribed: 6 @ RPE 5-6 · tempo 2-0-1-0 · rest 2:00
If pain flares
- Sharp pinch in the right hip crease at depth: regress first to a box squat at the height just above the pinch point; if still sharp, drop to a heel-elevated goblet squat at a shallower depth (this slot). Dull ache is fine — sharp, sudden, or pinching pain is the stop signal (§D.7).
- If regressing depth/load still sharpens it: swap the day's main lift to Romanian Deadlift (hip-hinge pattern) entirely and flag it for review — the final rung of the regression ladder (§D.7).
Accessories — Leg Volume (light)16 min
Leg Press

Light.
2 × 10-12 @ RPE 6 · tempo 2-0-2-0 · rest 1:30
Prescribed: 10-12 @ RPE 6 · tempo 2-0-2-0 · rest 1:30
Prescribed: 10-12 @ RPE 6 · tempo 2-0-2-0 · rest 1:30
DB Lunges
Light.
2 × 8/side @ RPE 6 · tempo 2-0-2-0 · rest 1:30
Prescribed: 8/side @ RPE 6 · tempo 2-0-2-0 · rest 1:30
Prescribed: 8/side @ RPE 6 · tempo 2-0-2-0 · rest 1:30
Leg Extensions
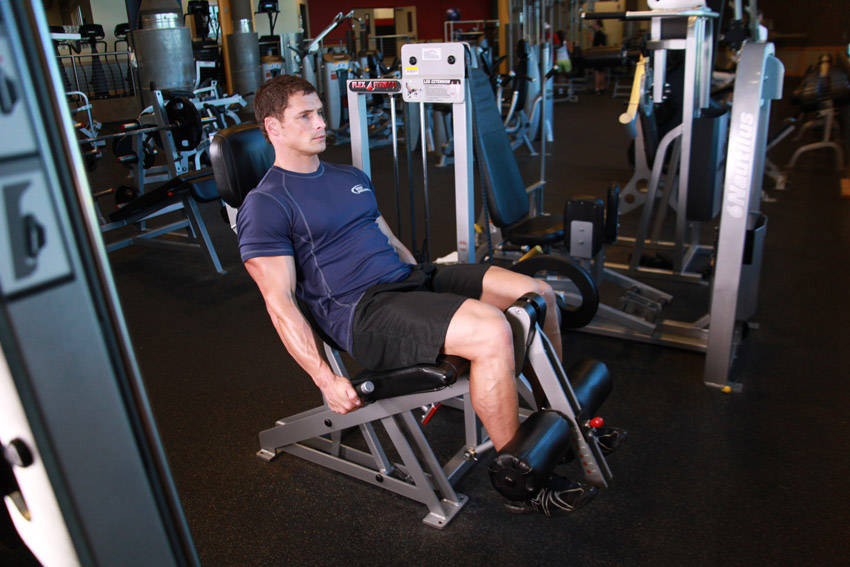
Easy effort.
2 × 10 @ RPE 6 · tempo 2-0-2-0 · rest 1:00
Prescribed: 10 @ RPE 6 · tempo 2-0-2-0 · rest 1:00
Prescribed: 10 @ RPE 6 · tempo 2-0-2-0 · rest 1:00
Leg Curls (machine)
Same.
2 × 10 @ RPE 6 · tempo 2-0-2-0 · rest 1:00
Prescribed: 10 @ RPE 6 · tempo 2-0-2-0 · rest 1:00
Prescribed: 10 @ RPE 6 · tempo 2-0-2-0 · rest 1:00
Single-leg Calf Raise
Same.
2 × 15/side @ RPE 6 · tempo 2-0-2-0 · rest 0:45
Prescribed: 15/side @ RPE 6 · tempo 2-0-2-0 · rest 0:45
Prescribed: 15/side @ RPE 6 · tempo 2-0-2-0 · rest 0:45
Mobility Finisher10 min
90/90 shin-box PAILs/RAILs

External video — Hip Mobility Drill: The Shin Box by Balance In Motion.
How to do it
- Setup
- Same 90/90 shin-box seat as the primer drill — front shin across your body, back shin behind you. Settle onto one side and stay there; this is a hold, not the switching flow.
- Execution
- PAIL: press the front shin/knee down into the floor, ramping the effort over 5-10s, hold the peak, release over 5s. RAIL: immediately lift that same shin/knee back up off the floor against your own resistance, hold 5-10s. That's one rep. Repeat for the prescribed reps, then switch which leg is in front and repeat on the other side.
- Common error
- Rushing the ramp instead of building it over the full 5-10 seconds, or letting the torso collapse forward to fake extra depth — sit tall throughout.
- Feel
- A deep, controllable stretch through the front hip during the PAIL, real muscular effort during the RAIL. Dull ache is fine and expected. A sharp pinch in the right hip crease means back off the depth immediately.
40-50% effort, 2 reps/side.
2 reps/side · ramp 20s, hold 8s · effort RPE 4-5 · rest 0:30-1:00
Prescribed: 2 reps/side · ramp 20s, hold 8s · effort RPE 4-5 · rest 0:30-1:00
Couch Stretch
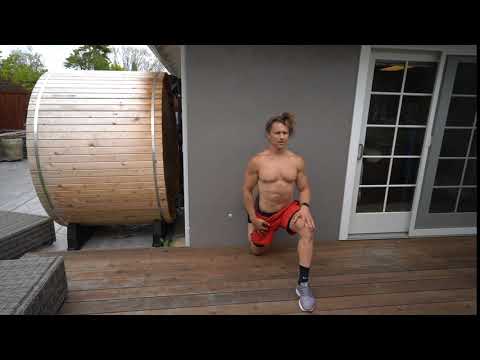
External video — Couch Stretch by Functional Bodybuilding.
How to do it
- Setup
- Kneeling lunge, rear shin up against a wall or couch/bench behind you, rear foot pointing up. Front foot flat on the floor, well out in front. Torso tall, ribs stacked over the pelvis.
- Execution
- Squeeze the rear glute to sink the hip forward and deepen the stretch. Hold completely still for the full prescribed time. This is a finisher drill only — never do it before lifting.
- Common error
- Arching the lower back to bring the torso closer to vertical instead of actually moving the hip forward — this fakes depth without touching the hip flexor. Keep the ribs pulled down and let the glute squeeze do the work.
- Feel
- A steady, building stretch through the front of the rear hip and thigh that should ease slightly the longer you hold it. Dull ache is normal. A sharp pinch in the right hip means come out of the position, don't fight it.
Passive hold, 75s each side.
75s/side hold · rest 0:15
Prescribed: 75s/side hold · rest 0:15
Pigeon Stretch
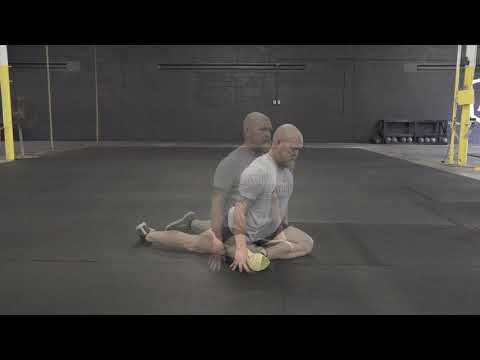
External video — PIGEON STRETCH by Atomic Athlete.
How to do it
- Setup
- Front leg bent, shin angled across your body with the front foot pointing toward the opposite hip. Back leg extended long behind you. Hips square to the floor, not twisted or hiked to one side.
- Execution
- Fold your torso forward over the front shin, letting your weight sink down. Hold still, breathing, for the full prescribed time.
- Common error
- Letting the hips rotate or hike up to force the front knee flatter — this fakes extra rotation from the hip instead of finding it honestly. Keep the hips square first, and accept whatever depth that leaves you with.
- Feel
- A deep stretch on the outside of the front hip and glute. A sharp pinch in the front of the hip crease means the angle is too aggressive — back the front shin off toward a less rotated position.
Passive hold, 60s each side.
60s/side hold · rest 0:15
Prescribed: 60s/side hold · rest 0:15
Sit-to-stand-from-depth screen
How to do it
- Setup
- Stand near — not on — a low box or bench, at roughly the depth you expect to be your limit. Arms crossed over your chest or reaching straight out in front — no hands on your knees or the floor.
- Execution
- Lower yourself to a series of progressively deeper positions. From each one, pause, then stand back up in one smooth motion — no bounce, no rocking, no hand assistance. The deepest position you can stand up from cleanly is this month's score. Note whether that stand-up felt smooth or wobbly.
- Common error
- Bouncing out of the bottom or rocking the torso to build momentum — that tests your ability to cheat the test, not your controlled strength. Reset and go again without the bounce.
- Feel
- The winning depth should feel hard but clean — like you only just made it, with no wobble. Compare the number and the smooth-or-wobbly note to last month's screen, not to anyone else's depth.
Monthly screen: sit-to-stand from full squat depth, hands free — smooth or wobbly? Note it.
1 @ RPE 3 (benchmark) · rest 0:30
Prescribed: 1 @ RPE 3 (benchmark) · rest 0:30